FLIGHT ATTENDANT UPGRADE KIT
Everything you need to know to take flight
Elevate Your Ride
You're here for one thing: to unlock your full riding potential with RockShox Flight Attendant.
To take flight, review the below information to determine which options are available for your bike, how to install the system, and how to complete the setup procedures to customize Flight Attendant for your ride.
Compatibility
Each Flight Attendant Upgrade kit is created to match a given frame's specifications so you get a perfect match every time. The fork is paired to the intended experience of the frame and the shock is sized to match, including mounting hardware and specific tune. Every kit also comes with the Flight Attendant Pedal Sensor to install into your DUB cranks so the system registers every pedal stroke.
The Flight Attendant system does require a SRAM DUB Crank for compatibility with the pedal sensor. E-MTB models, like the Canyon Spectral:ON will require a Shimano STEPS compatible Pedal Sensor, included with those compatible kits.
Alternatively, an Eagle Transmission Power Meter crank can be used.
Review the options below to find the correct Flight Attendant Upgrade Kit for your bike and then use the 12 digit part number to order from your favorite local bike shop or online dealer.

Flight Attendant Aftermarket Kit Part Numbers
Installation
After you find the right kit for you and receive your Flight Attendant components, the system will need to be installed. Below is a review of the installation instructions, but if you are unsure of anything, always work with your local bike store and qualified mechnics.
Fork
The Flight Attendant fork will install the same as all of our other single crown suspension forks. Review the Single Crown Suspension Fork User Manual for installation instructions.
Rear Shock
Flight Attendant uses a Super Deluxe rear shock and each upgrade kit comes with a custom tuned shock ready for the specified bike model. As frame designs, linkage hardware, and torque specs vary, review the frame manufacturers information to confirm the rear shock installation procedures. You can also review the Rear Suspension User Manual here for more information.
Flight Attendant Pedal Sensor
The pedal sensor for the Flight Attendant system is required to provide rider data into the system for proper adjustments. Each Flight Attendant Upgrade Kit comes with a Flight Attendant Pedal Sensor which works with any SRAM DUB MTB crank except DH versions.
SRAM DUB MTB cranks are manufactured with two different types of spindle, DUB SL and DUB, and you will need to determine the type on your bike to properly install the Flight Attendant Pedal Sensor.
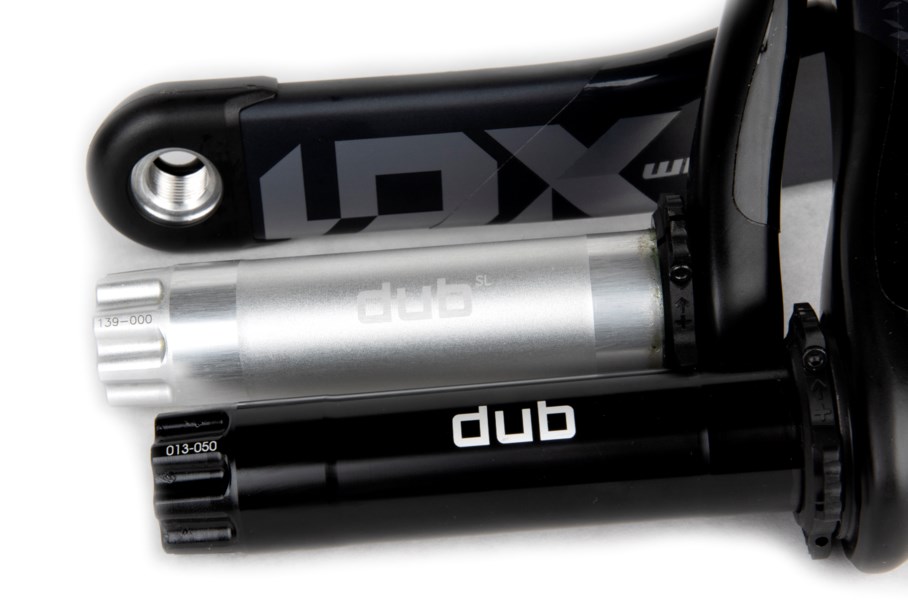
DUB SL (silver) and DUB (black)
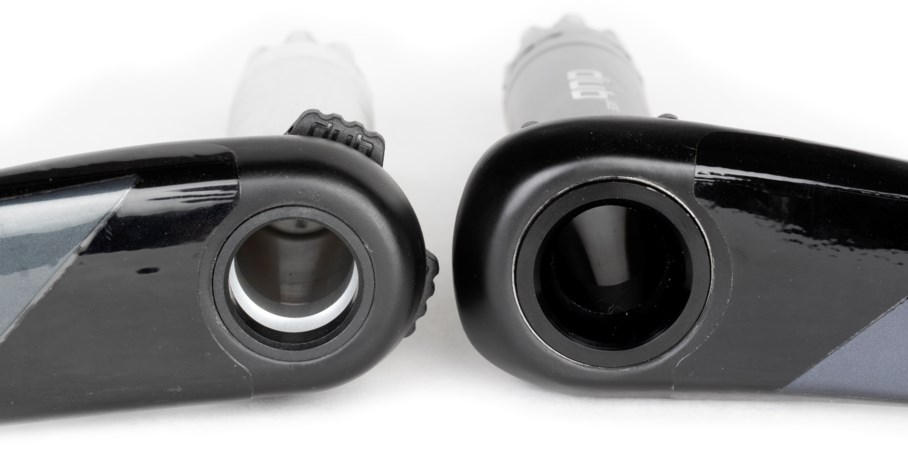
DUB SL (silver spindle with black cosmetic ring) and DUB (black)
The DUB version crank has an all-black spindle with "DUB" written in the middle, which is pressed directly into the crank arm. For these DUB cranks, the Flight Attendant Pedal Sensor will install directly into the spindle as shown below.
The DUB SL version crank has an all-silver spindle with "DUB SL" written in the center, which is bonded to the crank arm. For these DUB SL cranks, there is a black cosmetic ring covering the bonded connection between the spindle and crankarm. Prior to installing the Flight Attendant Pedal Sensor, the cosmetic ring must be removed.
Removal can be completed while the crank is installed on the bike or not, with a plastic tire lever.
DUB SL Cosmetic Ring Removal
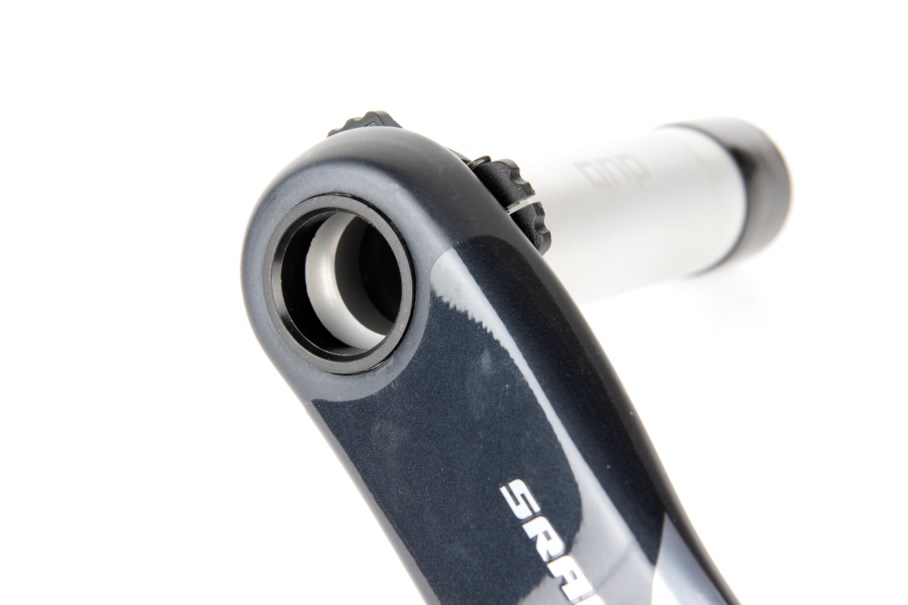
Locate the black cosmetic ring in the silver DUB SL spindle.
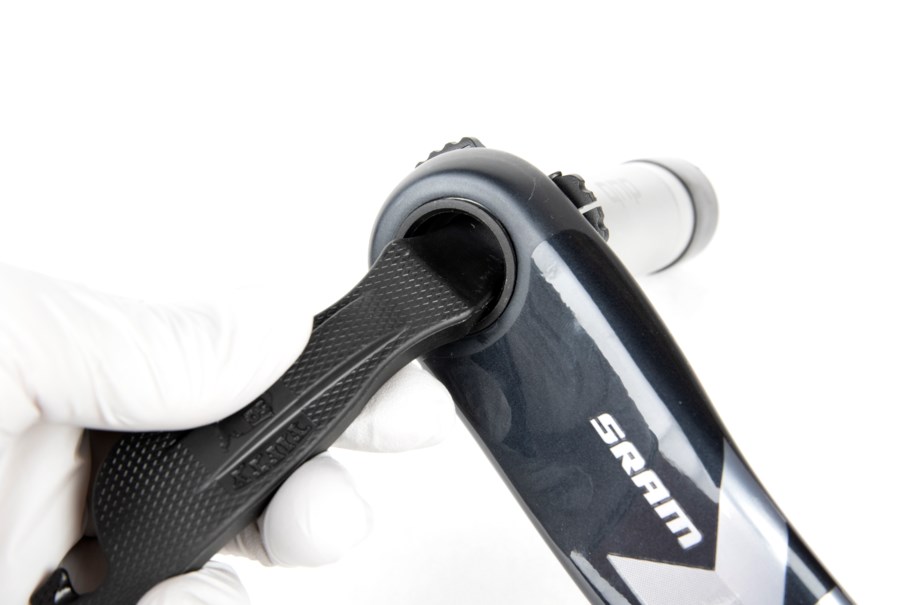
Use a Plastic tire lever to grab the inner lip of the cosmetic ring
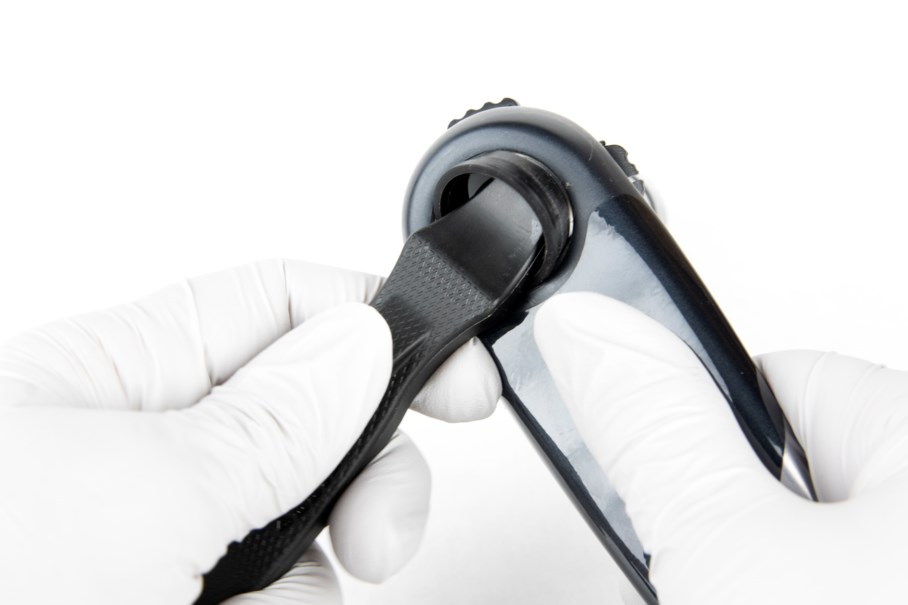
With the tire lever, pry up on the cosmetic ring
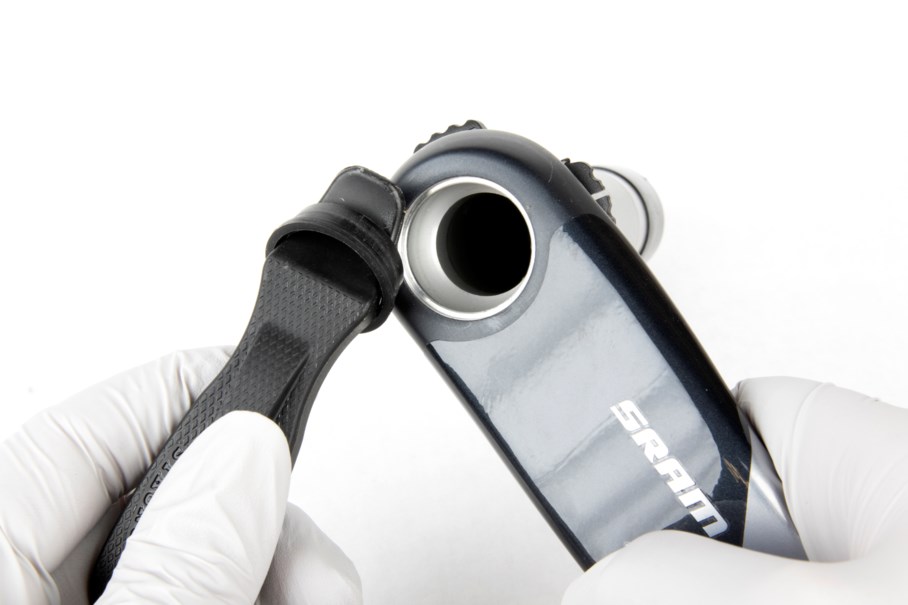
With the cosmetic ring removed, the pedal sensor can be installed.
Flight Attendant Pedal Sensor Intallation Procedure
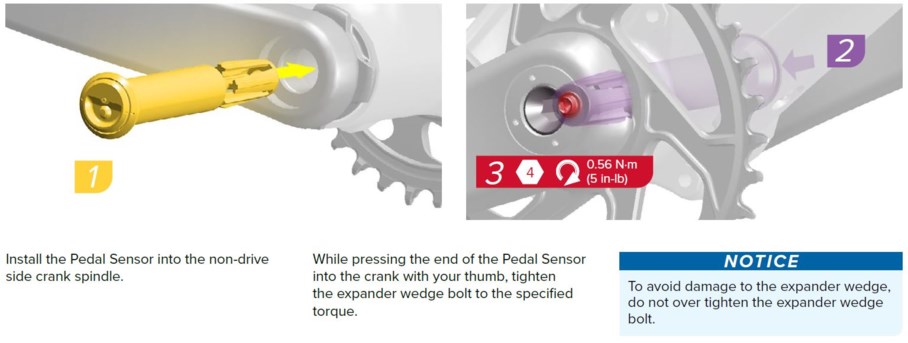
Setup Overview
Once your Fork, Shock, and Pedal Sensor are installed you will need to setup the Flight Attendant system for you!
You can review the Flight Attendant User Manual to discover all the details and customization the Flight Attendant system offers, but we've pulled together some videos below to get you started.
Watch the Flight Attendant: Quick Start video below for an overview of System Pairing, Suspension Setup, and Calibration which we will go into further detail later.
Pairing
The first thing you will need to do is pair the system.
Watch the below video for specific information on waking up the pedal sensor and pairing the system.
Suspension Setup
Next you will need to set the air pressure in your fork and shock. A great place to start is with the RockShox Trailhead app. The Trailhead app will suggest starting air pressures and rebound settings for your Fork and Shock. Just locate the serial number on your Fork and Shock and enter into the app. The app will ask you for rider weight, if this is for an E-bike, and a desired sag for your Shock.
Then make the suggested adjustments on your Fork and Shock. For more information on how and why to make certain adjustments, review the a Suspension Setup and Tuning Guide or watch the Flight Attendant: Suspension Setup Video below.
Calibration
Once the system is paired and the suspension air pressure is set, you can complete the calibration process. This process ensures the system is caibrated to your bikes specific gemoetry and your suspension air pressure and sag positions. Once the system is calibrated, you do not need to caibrate the system again, unless you change travel in the fork or significantly change your sag position.
Watch the below video to complete the calibration process.
Take Flight
Once you've completed the calibration process, you're ready to take your first ride with Flight Attendant. However, there are many more user benefits and customizable features in the Flight Attendant System. To learn more, review the full Flight Attendant User Manual, watch the other videos on the Flight Attendant System, visit the SRAM AXS App for full customization of your complete AXS System, or visit the RockShox Flight Attendant FAQ for more information.