{{ data.msg }}

Your browser does not support all of our website’s functionality. For an improved shopping experience, we recommend that you use the most recent versions of Google Chrome, Safari, or Firefox.

FÜR ALLES BEREIT

Damit du dich auf die vor dir liegende Fahrt konzentrieren kannst, solltest du dir die wichtigsten Infos für Unterwegs holen.

LAUFRAD AUSBAU & EINBAU

Der Aus- und Einbau des Hinterrads ist immer noch schnell und einfach, egal ob du mitten im Rennen ein Laufrad wechselst oder dein Rad für den Transport vorbereitest.

Zugehöriges Bild

SO GEHT’S: HINTERRAD AUSBAUEN

Zugehöriges Bild

SO GEHT’S: HINTERRAD EINBAUEN

FEINABSTIMMUNG

Um die Schaltperformance zu optimieren oder unerwünschte Geräusche zu eliminieren, kannst du die Trimmposition des Schaltwerks mit MicroAdjust™ einstellen. Diese Funktion gleicht die kleinen Toleranzen aus, die an der Nabe auftreten können.

TECH TIPP: Weniger ist mehr. Stelle mit MicroAdjust einen Klick nach dem anderen ein, bis die Schaltvorgänge perfekt sind.

Zugehöriges Bild

SO GEHT’S: FEINABSTIMMUNG MIT DEM POD CONTROLLER

Zugehöriges Bild

SO GEHT’S: FEINABSTIMMUNG MIT DER AXS APP

TRAILSIDE CHECKS

Zugehöriges Bild

TRAILSIDE IMPACT RESET

Der Full Mount an deiner Eagle Transmission ist so konstruiert, dass er sich bei einem Frontalaufprall dreht und dein Schaltwerk aus der Gefahrenzone bringt. In diesem Fall ist ein einfaches Reset auf dem Trail erforderlich, um das Schaltwerk neu zu justieren. Es gibt zwei Möglichkeiten, das Schaltwerk zurückzusetzen: eine einfache Methode, bei der die Hinterachse verwendet wird, oder eine manuelle Methode, die in Notfällen angewendet werden kann.

Worauf du achten musst: Wenn dein Schaltwerk einen Schlag abbekommen hat, überprüfe, ob die Markierung am Rändelring mit der Markierung am Full Mount übereinstimmt. Wenn sie falsch ausgerichtet ist, muss es auf dem Trail zurückgesetzt werden.

Zugehöriges Bild

SO GEHT’S: RESET MIT ACHSE

Zugehöriges Bild

SO GEHT’S: RESET MIT DER HAND

Zugehöriges Bild

DAS MUSS SO AUSSEHEN

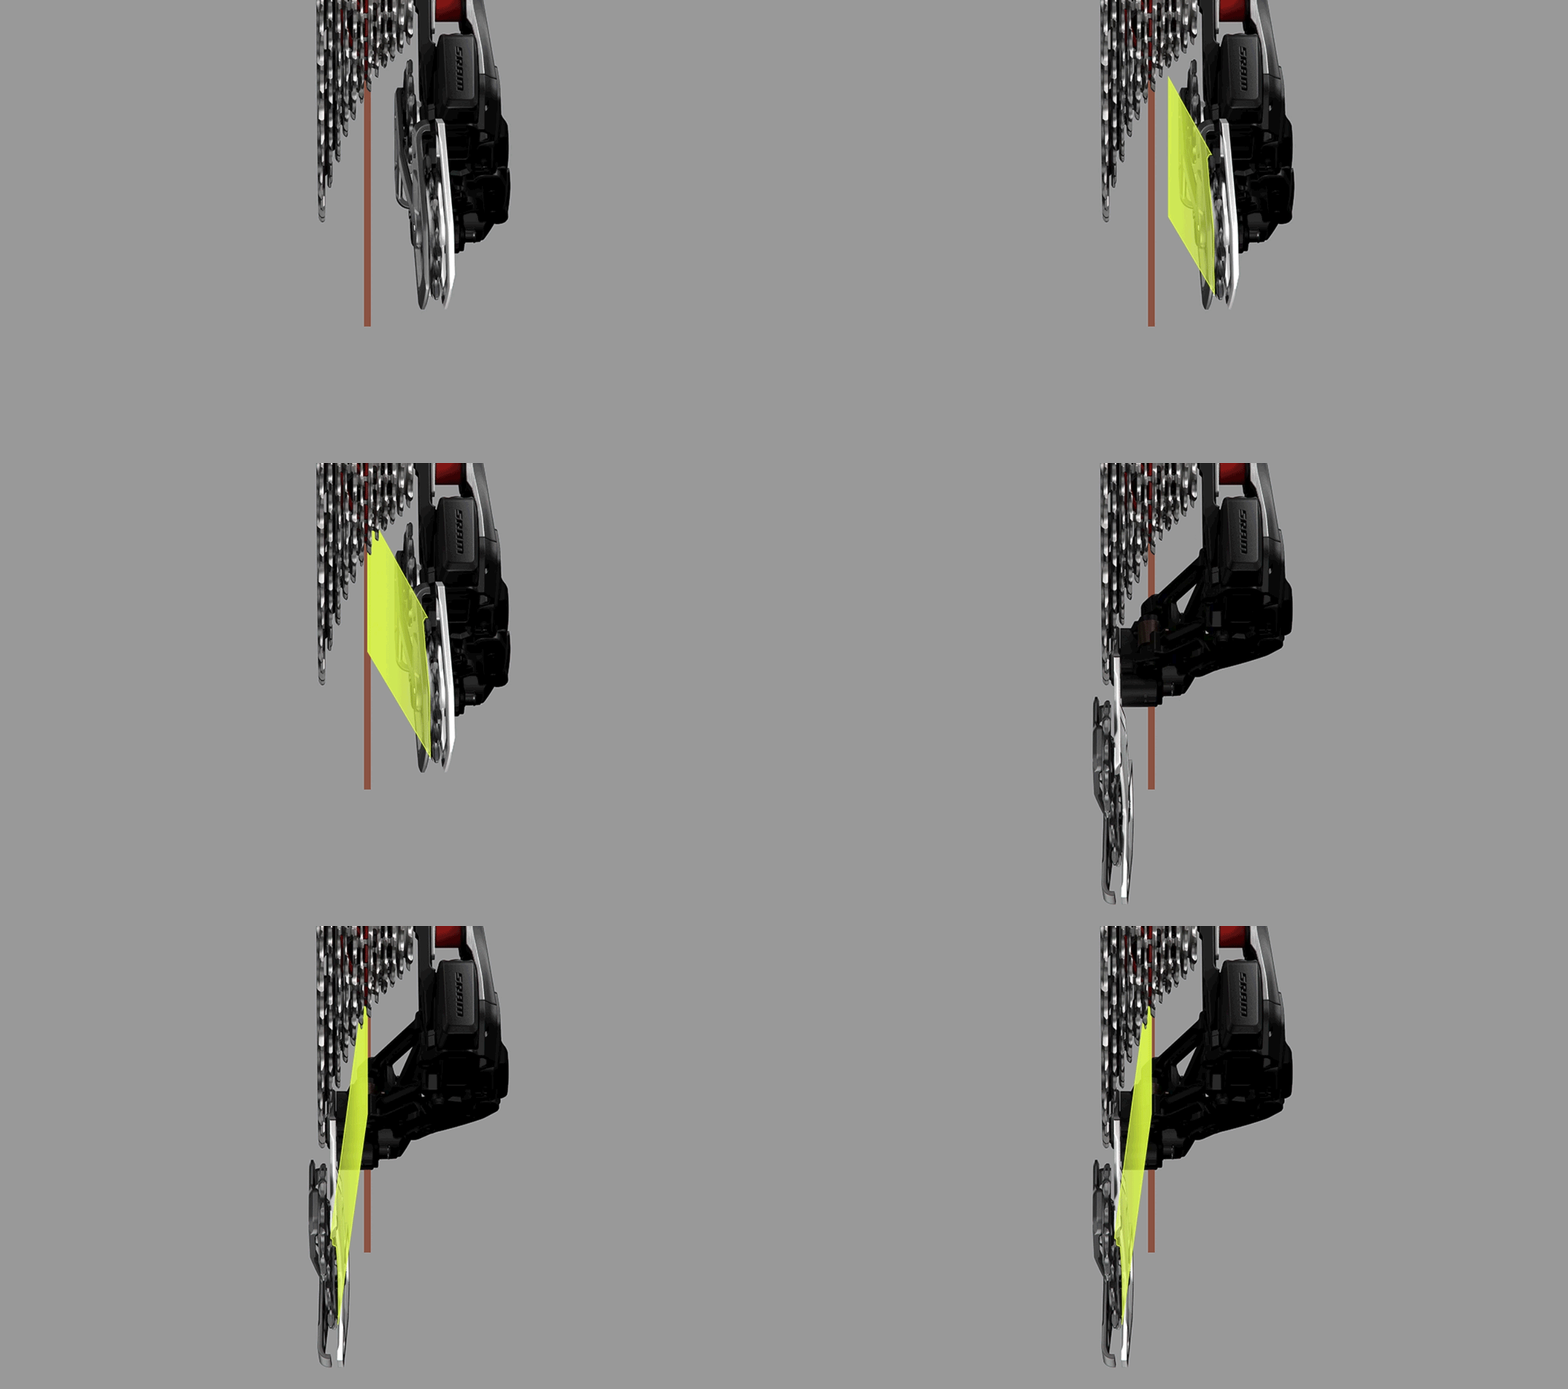
Das Eagle Transmission Schaltwerk nimmt seine Schaltröllchen in einem so genannten Inline-Käfig auf. Er ist so ausgerichtet, dass das obere Schaltröllchen perfekt mit der Kassette fluchtet und das untere Schaltröllchen in einem optimalen Winkel zum vorderen Kettenblatt steht - was den Eindruck erweckt, dass es verbogen ist.

MECHANICAL CHECK

If the shifting performance of your Eagle Transmission suddenly goes from good to bad, you need to confirm if your derailleur setup position has changed. This position in relation to the cassette is essential for the system to shift perfectly. Perfect setup, perfect performance.


STEP 1: Check whether you need to do a Trailside Impact Reset: verify that the knurled ring mark is aligned with the mark on the full mount. If misaligned, a trailside impact reset is required. See the Trailside Impact Reset section above. If the two marks are aligned, move to the next step.

STEP 2: Confirm the required Setup Cog, and Setup Key position for your bike by checking the Chain Length & Setup Key Calculator, or in the SRAM AXS App. 

STEP 3: Shift to the required Setup Cog and locate the Key Line (A or B) on the derailleur cage that matches the Setup Key (A or B) position of your derailleur. You will need to verify that the specified Key Line is aligned with the edge of the Setup Key/Cage Mode housing. If the housing is overlapping, or there is a noticeable gap, reperform the derailleur set up process from the Tighten The Components Step

Zugehöriges Bild

DIGITALER SYSTEMCHECK

Wenn deine Eagle Transmission nicht mehr schaltet, liegt es wahrscheinlich am Schaltwerkakku, der aufgeladen werden muss, an der Batterie des Controllers, die ausgetauscht werden muss, oder am System, das gekoppelt werden muss.

Überprüfe den Akku bzw. Batterieladestand, indem du die AXS-Taste am Schaltwerk und am Controller drückst. Kein Licht? Dem Akku bzw. der Batterie ist der Saft ausgegangen.

Wenn der Akku bzw. die Batterie Strom haben, kopple das System erneut, um sicherzustellen, dass das gesamte System miteinander kommuniziert.

TECH TIPP: Wenn die Batterie des AXS Pod Controllers auf dem Trail nicht funktioniert, kannst du mit einem einfachen oder einem Doppelklick auf die AXS-Taste des Schaltwerks einen passenden Gang einlegen. Einfacher Klick für schwerer, Doppelklick für leichter.

PERFECT SETUP

If your Eagle Transmission isn’t shifting well upon set up, or after making some changes to bike geometry or chainring size, you will need to confirm that your derailleur setup position is correct. This position in relation to the cassette is essential for the system to shift perfectly.

Eagle Transmission’s all-new, simplified set up procedure is a radical departure from previous drivetrain systems. It gives simple to set up a new meaning, but it is also a new process for everyone to learn. If one step is overlooked, it may cause the system to be setup incorrectly. Most often, carefully reperforming the setup procedure will solve most setup errors. Perfect setup, perfect performance.

STEP 1: Confirm the required chain length, Setup Cog, and Setup Key position for your bike by checking the Chain Length & Setup Key Calculator, or in the SRAM AXS App. For bikes that include an idler pulley, please see the Idler Pulley Information link below instead of using the calculator.

STEP 2: Starting with the Powerlock, carefully count the links to verify that the chain is the correct length as found in step 1. If the chain is the correct length, move to the next step. If too long or too short, correct the length and move to next step.

STEP 3: Verify that your derailleur is in the correct Setup Key position (A or B) as identified in step 1, located on the underside of the P-knuckle.

STEP 4: Shift to the required Setup Cog and locate the Key Line (A or B) on the cage that matches the Setup Key (A or B) position of your derailleur. You will need to verify that the specified Key Line is aligned with the edge of the Setup Key/Cage Mode housing. If the housing is overlapping, or there is a noticeable gap, reperform the derailleur set up process from the Tighten The Components Step.

DAS WICHTIGSTE VOR DER FAHRT

VORHER

MACH ES ZU DEINEM

Weiter