{{ data.msg }}

Your browser does not support all of our website’s functionality. For an improved shopping experience, we recommend that you use the most recent versions of Google Chrome, Safari, or Firefox.

READY FOR ANYTHING

To keep you focused on the ride ahead, arm yourself with some essential trailside knowledge.

WHEEL REMOVAL & INSTALLATION

Rear wheel removal and installation is still fast and simple, whether you’re swapping a wheel mid-race or preparing your bike for transport.  

Related Image

HOW TO: REMOVE YOUR REAR WHEEL

Related Image

HOW TO: INSTALL YOUR REAR WHEEL

FINE-TUNING

To further optimize shift performance or eliminate unwanted rasping sounds, adjust the rear derailleur trim position using MicroAdjust. This feature compensates for the subtle variations that can occur at the hub.

TECH TIP: Less is more. MicroAdjust one click at a time until performance is optimized.

Related Image

HOW TO: FINE-TUNE USING POD CONTROLLER

Related Image

HOW TO: FINE-TUNE USING AXS APP

TRAILSIDE CHECKS

Related Image

IMPACT RESET

The Full Mount on your Eagle Transmission is designed to rotate in the event of frontal impact, moving your derailleur away from danger. A simple trailside reset may occasionally be required to re-align your derailleur’s position. There are two ways to perform the reset: a simple method utilizing the rear axle, or a more manual approach that can be used in a pinch.

What to look for: if you’ve struck your derailleur, verify that the knurled ring mark is aligned with the mark on the full mount. If misaligned, a trailside impact reset is required.

Related Image

HOW TO: RESET WITH AXLE

Related Image

HOW TO: RESET BY HAND

Related Image

IT’S SUPPOSED TO LOOK LIKE THAT

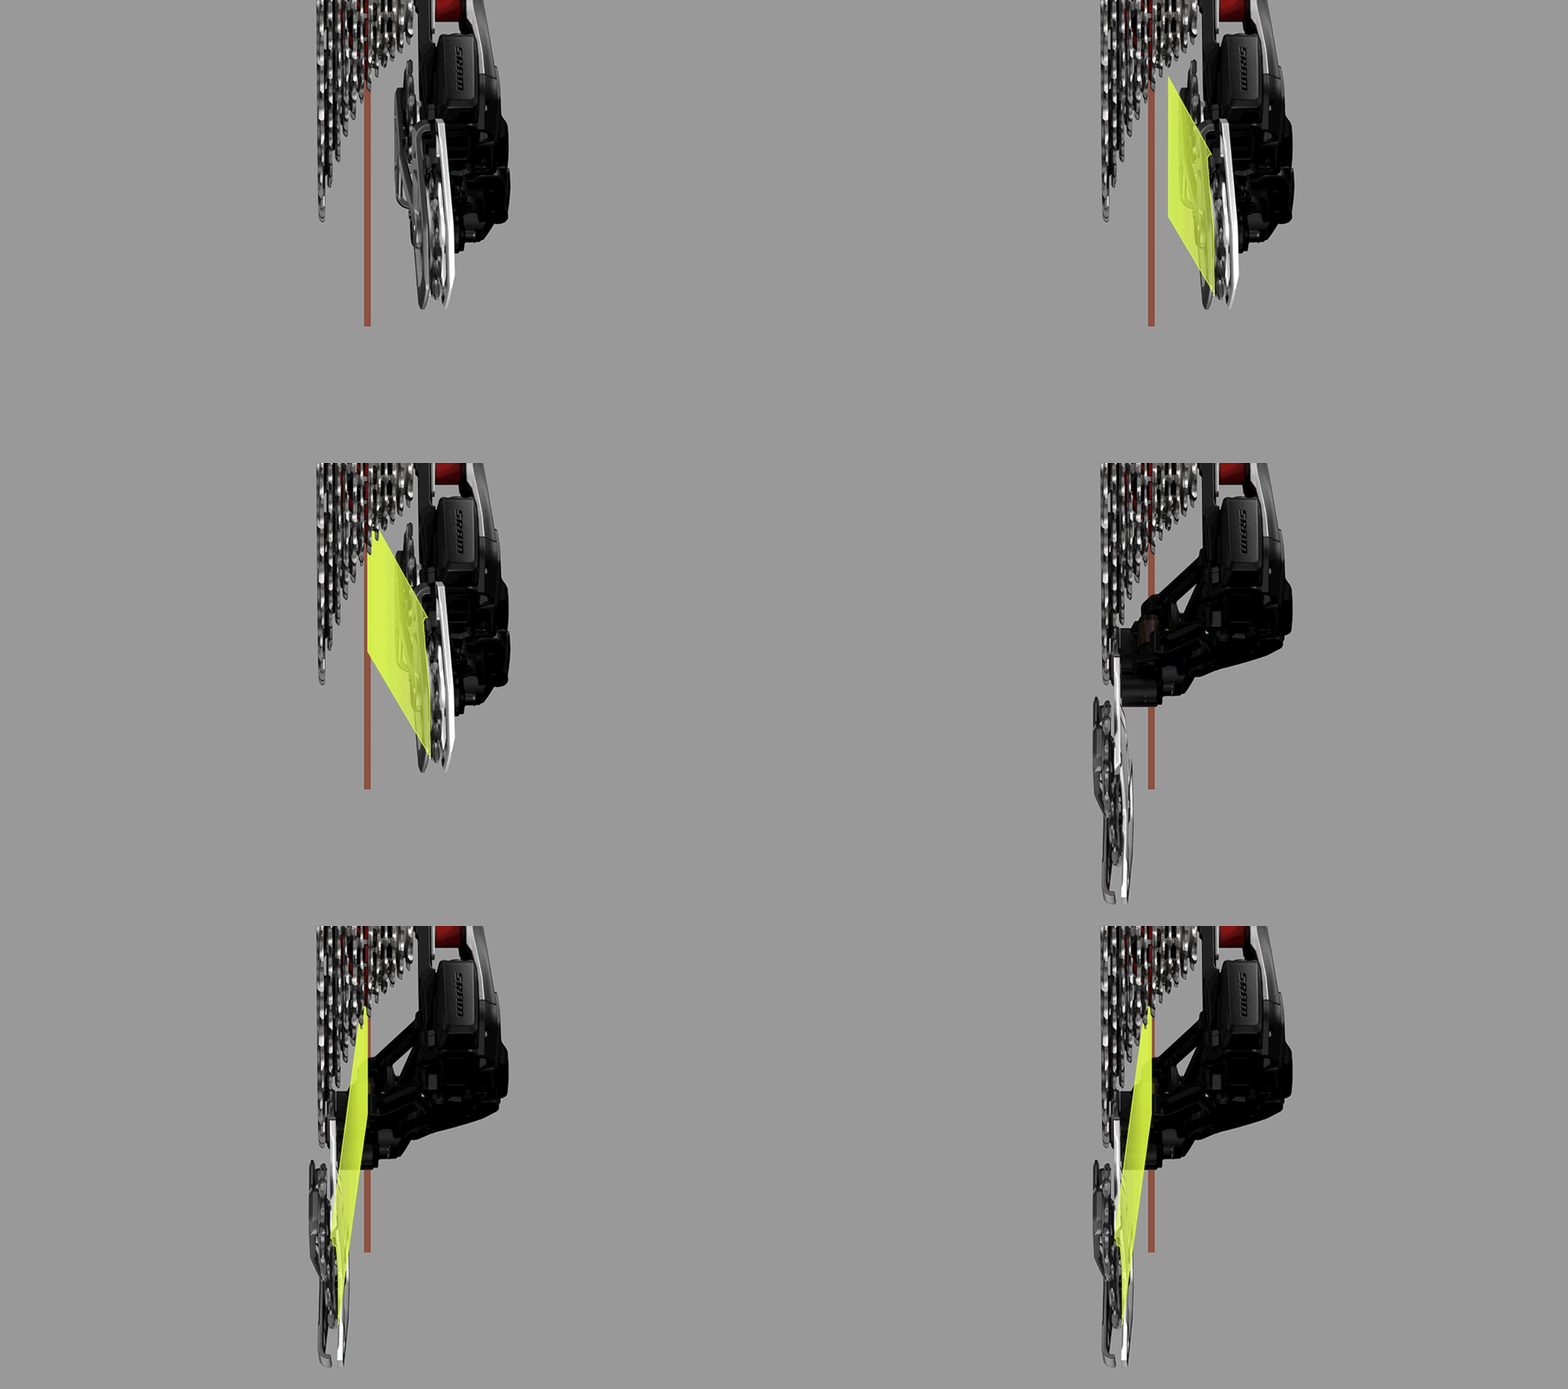
The Eagle Transmission derailleur houses its pulley wheels in what we call our Inline Cage. Oriented to keep the top pulley in perfect alignment with the cassette, it also keeps the bottom pulley at an optimum angle with the front chainring — which gives it the appearance of having a twist.

MECHANICAL CHECK

If the shifting performance of your Eagle Transmission suddenly goes from good to bad, you need to confirm if your derailleur setup position has changed. This position in relation to the cassette is essential for the system to shift perfectly. Perfect setup, perfect performance.


STEP 1: Check whether you need to do a Trailside Impact Reset: verify that the knurled ring mark is aligned with the mark on the full mount. If misaligned, a trailside impact reset is required. See the Trailside Impact Reset section above. If the two marks are aligned, move to the next step.

STEP 2: Confirm the required Setup Cog, and Setup Key position for your bike by checking the Chain Length & Setup Key Calculator, or in the SRAM AXS App. 

STEP 3: Shift to the required Setup Cog and locate the Key Line (A or B) on the derailleur cage that matches the Setup Key (A or B) position of your derailleur. You will need to verify that the specified Key Line is aligned with the edge of the Setup Key/Cage Mode housing. If the housing is overlapping, or there is a noticeable gap, reperform the derailleur set up process from the Tighten The Components Step

Related Image

DIGITAL CHECK

If your Eagle Transmission stops shifting, it’s probably something as simple as a derailleur battery that needs charging, a controller battery that needs to be replaced, or a system that needs to go through the pairing process.

• Check the battery status by pressing the AXS button on the derailleur and the controller. No light? That battery is out of juice.

• If the batteries have power, re-pair the system to ensure the whole system is communicating.

TECH TIP: In case of a dead AXS Pod Controller battery out on the trail, use a quick single or double click of the derailleur’s AXS button to initiate a shift to a suitable gear. Single click for harder, double click for easier.

WATCH PAIRING VIDEO

PERFECT SETUP

If your Eagle Transmission isn’t shifting well upon set up, or after making some changes to bike geometry or chainring size, you will need to confirm that your derailleur setup position is correct. This position in relation to the cassette is essential for the system to shift perfectly.

Eagle Transmission’s all-new, simplified set up procedure is a radical departure from previous drivetrain systems. It gives simple to set up a new meaning, but it is also a new process for everyone to learn. If one step is overlooked, it may cause the system to be setup incorrectly. Most often, carefully reperforming the setup procedure will solve most setup errors. Perfect setup, perfect performance.

STEP 1: Confirm the required chain length, Setup Cog, and Setup Key position for your bike by checking the Chain Length & Setup Key Calculator, or in the SRAM AXS App. For bikes that include an idler pulley, please see the Idler Pulley Information link below instead of using the calculator.

STEP 2: Starting with the Powerlock, carefully count the links to verify that the chain is the correct length as found in step 1. If the chain is the correct length, move to the next step. If too long or too short, correct the length and move to next step.

STEP 3: Verify that your derailleur is in the correct Setup Key position (A or B) as identified in step 1, located on the underside of the P-knuckle.

STEP 4: Shift to the required Setup Cog and locate the Key Line (A or B) on the cage that matches the Setup Key (A or B) position of your derailleur. You will need to verify that the specified Key Line is aligned with the edge of the Setup Key/Cage Mode housing. If the housing is overlapping, or there is a noticeable gap, reperform the derailleur set up process from the Tighten The Components Step.

RIDE ESSENTIALS

PREVIOUS

MAKE IT YOURS

Next